Nowadays, ceramic uses in a variety of things. We use ceramics in pottery, hand watches, and tiles, as ceramics are not metals. It is a non-metal and brittle material. It breaks easily on applying a large amount of force. Ceramic paint is quite popular. We paint ceramic on almost every piece of pottery to make it shine and give it super strength. Let’s see the methods of how to repair hairline cracks in ceramic floor tile?
Similarly, ceramic tiles are used on walls and over floors. They give a hilarious look to the interior of the home. It is a nice hard surface we can install on the interior. Moreover, ceramic tiles are durable and cost a little, so they are a good option for furnishing the home interior.
Why ceramic tiles floor get hairline cracks?
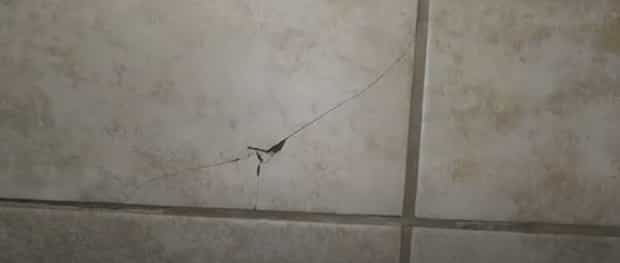
Ceramic tiles are hard material; any hard material can break if you apply force more than it can bear. For example, if you drop something on the floor weighing 30 kg, definitely chances to break the ceramic tile.
So, like any material, ceramic could be damage to some extent. Despite applying forces, they can damage if we use them prolong. Over the period, their strength declines as molecular bonds weaken, resulting in damage or cracks in ceramic tiles. Read more, ceramic sink repair.
What if the hairline crack in the tile is not repaired?
It is an even worse idea not to repair or replace the ceramic tile. It has a lot of disadvantages like; it gives a shitty look to the floor. Not repairing your tiles for a long time allows water to penetrate the flour. The surface beneath the floor deepens, and the whole structure can be endangered.
How to repair hairline cracks in ceramic floor tile?
There are some simple steps given below to repair hairlines in the ceramic tile. Details have been provided in the whole section, and till you reach the bottom of the article, there will be no ambiguity left. Follow the step-by-step procedure given below to get desired results. There are two simple steps to repair your cracked ceramic tile.
Repairing a piece of hairline cracked ceramic tile
The technique of repairing the tile is used depending upon the damage to the ceramic tile. The first step is to determine the extent of the damage. Hairline cracks find them as good candidates for this approach.
We have to remember two things while repairing the cracks in tiles. The first is that we want to seal the broken area so well that no moisture can cross it in the future. The second is that we have to strengthen the area so that it shouldn’t be broken or cracked on applying a little pressure in the future. After all, we will use this surface for a walk. Check here; how to repair ceramic tiles?
Epoxy to the rescue
The next step is to use epoxy for sealing the tiles. Hence, for this purpose, we use epoxy made from good quality material. Choose epoxy, which is specially made to attach the stones. Now, we will use filler to fill up the tile. Fillers are not extra compounds we buy. We mix the epoxy and part epoxy to make a glue-like material. This is called “filler.” This “filler” has great adhesive qualities.
Many people recommend different products use as epoxy. But, we must use “GraniTile360” glue. This product has amazing results, and it endures a large amount of weight without getting crack. It can even repair the most visible crack on the tile surface. Now is time to fill the area with the filler we just made. There are simple steps given below. Related article, how to lay ceramic tiles over the concrete floor?
- Clean the area
- Making the glue
- Give it some time to stand
- Tinting
Let us start with the first step.
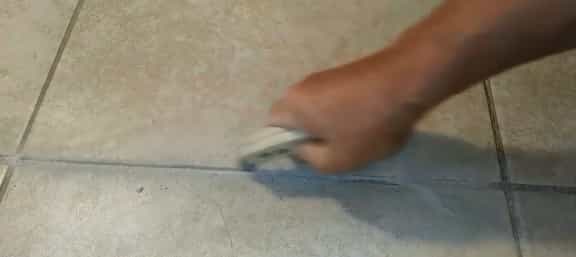
Clean the ceramic tiles hairline cracked area

First of all, you clean the area thoroughly. Cleaning is important, as it is the base of joining the tiles once again. If there is any debris leftover among tiles, it would be difficult to repair the tiles with effectiveness. The adhesion process will be affected greatly. You can use alcohol or phenols to clean the area. Hence you can use “methanol” or “acetone”. Both are great for cleaning.
Making the glue for cracked hairline ceramic tile
The second step is about making the adhesive material that will bind the tiles together. We have already discussed the method of making ceramic glue. We make glue by mixing equal parts from both bottles.
At this time, it is a crucial process of applying glue in between the cracks of tiles. This step should perform carefully, and try not to waste extra glue from any side of the tile. It is a better idea to use a chopstick to apply glue among the tiles. The wooden chopstick or a pop cycle is an even better option to perform the task.
As we have already informed, the sealing and strengthening process. We use “glue” for sealing purposes, and for strengthening, we use “hardening material.” Moreover, don’t extract material from both bottles with a single chopstick.
Use different sticks for both bottles, as many people don’t do this. Apply resins on the top of ceramic tiles as well, and it is better to apply a bit more on the top. It is necessary to this because we want to make sure that there is no deficiency left in joining the tiles together.
Allow it to dry properly
Once you have applied all the resins, give it a little time to stand. We usually give 7-10 minutes to it.
After 10 minutes, wipe away the excess resin from the surface. For this, you can use a rubber or a razor blade.
Tinting the glued ceramic tile
When you finished removing the hairline cracks, you will notice the unusual color or resin looks different from the rest of the tiles. So, we wish to have the same color all over the floor. For this purpose, we will tint our newly repaired tiles. It depends upon the size of the crack, as small sizes cracks aren’t bad in look. But, if the crack is considerably bigger, then we go coloring it.
Mixing the pigments which closely match the floor is what many people do. We generally use two kinds of tints, one being “powder tint,” and the other is “liquid tint.” Both tints are equally important in use.
They are used with the same idea as we used for resins. We mix both the colorants together and keep mixing until it gives the color that matches the color of the tiles. We hope how to repair hairline cracks in ceramic floor tile article will help you a lot.
Best way to repair hairline cracks in ceramic tile
Repairing hairline cracks in ceramic floor tiles can help prevent further damage and maintain the aesthetics of your floor. Here’s a step-by-step guide on how to repair these cracks:
Materials and Tools You’ll Need:
- Epoxy filler or ceramic tile repair kit
- Putty knife or a plastic scraper
- Clean cloth or sponge
- Fine-grit sandpaper
- Tile and grout sealer (optional)
- Safety glasses and gloves
Step-by-Step Guide:
Safety Precautions:
Put on safety glasses and gloves to protect your eyes and hands during the repair process.
Clean the Area:
Thoroughly clean the cracked tile and the surrounding area to remove any dirt, dust, or debris. Use a clean cloth or sponge and a mild detergent.
Assess the Crack:
Examine the hairline crack closely to ensure it’s clean and free of loose fragments. If there are loose pieces, gently remove them with a putty knife or plastic scraper.
Mix the Epoxy Filler:
If you’re using epoxy filler, follow the manufacturer’s instructions to mix it. Typically, epoxy fillers come in two parts that need to be mixed together. Ensure you mix it thoroughly to achieve a uniform consistency.
Apply the Epoxy Filler:
Using a putty knife or a plastic scraper, apply a small amount of epoxy filler directly into the crack. Ensure that the filler fills the entire crack.
Smooth the Filler:
Smooth the epoxy filler over the crack, ensuring it’s flush with the tile surface. Use the putty knife or a plastic scraper to level it.
Remove Excess Filler:
While the epoxy filler is still pliable, use a clean, damp cloth or sponge to wipe away any excess filler from the tile surface. Ensure that the filler remains in the crack.
Let the Epoxy Cure:
Allow the epoxy filler to cure according to the manufacturer’s instructions. This typically takes a few hours to overnight, depending on the product.
Sand the Repaired Area (Optional):
If the repaired area is not perfectly smooth after the epoxy has cured, you can gently sand it with fine-grit sandpaper to achieve a seamless finish. Be cautious not to damage the surrounding tiles.
Clean and Seal (Optional):
After the repair has fully cured, clean the tile surface once more to remove any remaining residue. Optionally, you can apply a tile and grout sealer over the entire tile surface to protect it from future damage and staining.
Final Inspection:
Carefully inspect the repaired tile to ensure the crack is filled and the surface is smooth and even.
Repairing hairline cracks in ceramic floor tiles is a relatively straightforward process, and it can help extend the life of your flooring while maintaining its appearance. However, for larger cracks or more extensive tile damage, it’s advisable to consult a professional tile installer to ensure a high-quality repair.
FAQs
Certainly! Here are some frequently asked questions (FAQs) regarding the repair of hairline cracks in ceramic floor tiles:
What causes hairline cracks in ceramic floor tiles?
Hairline cracks in ceramic floor tiles can occur due to various factors, including structural movements, temperature fluctuations, settling of the building, or minor impacts. They can also result from improper installation or the natural aging of the tiles.
Can I use regular grout to repair hairline cracks in ceramic tiles?
Regular grout is typically not suitable for repairing hairline cracks as it is too coarse and may not effectively fill such narrow gaps. It’s recommended to use epoxy filler or specialized ceramic tile repair products designed for this purpose.
Do I need to replace the entire tile if it has a hairline crack?
In most cases, you can repair hairline cracks without replacing the entire tile. Using epoxy filler or a ceramic tile repair kit can effectively fill the crack, preventing further damage and maintaining the appearance of the tile.
Can I use caulk to repair hairline cracks in ceramic tiles?
While caulk is often used for sealing joints and gaps, it is not the best choice for repairing hairline cracks in ceramic tiles. Epoxy filler or specialized ceramic tile repair products are better suited for this purpose, as they provide a more durable and stable repair.
How long does it take for epoxy filler to cure in hairline cracks?
The curing time for epoxy filler can vary depending on the product and environmental conditions. It may take several hours to overnight. Refer to the manufacturer’s instructions for specific curing times and guidelines.
Will the repaired area be as strong as the original tile?
When properly applied, epoxy filler or specialized repair products can restore the strength and integrity of the tile, making the repaired area as strong as the original. However, it’s important to follow the manufacturer’s instructions for the best results.
Can I walk on the repaired tile immediately after the repair is complete?
While some epoxy fillers may set quickly, it’s advisable to wait until the recommended curing time has passed before subjecting the repaired tile to foot traffic. Rushing this step can compromise the repair’s durability.
Can I use the repaired tile in wet areas like bathrooms or kitchens?
Yes, if you use an appropriate epoxy filler or ceramic tile repair product and follow the manufacturer’s instructions for waterproofing, you can use the repaired tile in wet areas. Proper sealing and curing are essential for moisture resistance.
Can I repair hairline cracks in a tile floor with underfloor heating?
Repairing hairline cracks in a tile floor with underfloor heating should be approached with caution. Consult a professional to ensure that the repair does not affect the heating system. It’s important to use compatible materials that can withstand the heat.
Are there any long-term maintenance considerations for repaired tiles with hairline cracks?
To maintain the integrity of the repair, avoid heavy impacts or abrasive cleaning methods on the repaired area. Regularly clean and maintain the floor to prevent further damage and ensure the longevity of the repair.
Conclusion
In conclusion, knowing how to repair hairline cracks in ceramic floor tiles is a practical skill that can help homeowners preserve the appearance and functionality of their tile floors. These fine cracks, though small, can lead to more extensive damage if left unaddressed. Repairing hairline cracks is a relatively straightforward process that can be done with the right materials and techniques.
Key takeaways from this guide on repairing hairline cracks in ceramic floor tiles include:
- Understanding the Causes: Hairline cracks in ceramic tiles can result from various factors, including structural movements, temperature changes, settling, or minor impacts.
- Proper Repair Materials: It’s essential to use the right materials for the repair, such as epoxy filler or specialized ceramic tile repair products, as they are designed to fill narrow gaps effectively.
- Step-by-Step Repair Process: The repair process involves cleaning the area, assessing the crack, applying the filler, and ensuring a smooth and level surface. Following each step carefully is crucial for a successful repair.
- Curing Time: Allow the epoxy filler to cure for the recommended duration specified by the manufacturer. This ensures the repaired area is strong and stable.
- Maintenance Considerations: While the repaired area can be as strong as the original tile, it’s essential to avoid heavy impacts and abrasive cleaning methods to prevent further damage. Regular cleaning and maintenance will help preserve the repair’s integrity.
Repairing hairline cracks in ceramic floor tiles can extend the life of your flooring and maintain its aesthetic appeal. By following the provided guidance and taking the necessary precautions, homeowners can achieve successful repairs and enjoy long-lasting, beautiful tile floors.