Christmas tree glorifies our moments as they add a glorifying touch in our adornments. People found them in the 1960s, and they are popular till today. They make the scene unique at special events and give a great look. Imagine a special event, and a tree is behind you full of light. It provides such satisfying feelings. That’s why people tend to demand the Christmas tree. Let’s know how to make a ceramic Christmas tree?
There is a specified procedure to make the Christmas tree. You can make this by using some simple techniques. It is good to know every single detail if you want to start your own small business of making Christmas trees.
Below is a simple procedure, and every step is discussed in detail.
Requirements for making Christmas tree
These are things listed below you need to make a Christmas tree.
- Liquid clay
- Small drill or pointy object
- Sponge or cleaning material
- Kiln or oven
- Paint
- Lights
How to make a ceramic Christmas tree step by step

- Slip preparation
- Drilling the holes
- Drying the slit
- Cleaning
- Firing to bisque
- Glazing the product
- Touching up
- Firing again
- Lights
1) Slip preparation
Making our special tree starts with thoroughly mixing the clay with water. It becomes the liquid clay. The other name we use for liquid clay is “slip.” We have molded a special trunk that gives the shape Christmas tree.
Firstly, make sure about the slip that it is wet enough. The Christmas truck is made up of two or three plaster pieces. It would be best if you poured the slip into the trunk and different pieces of plaster are joining together.
Slip takes some time to set. It is allowed to set well. Time for setting the slip varies. If the tree is large, slip can take several hours to set in its place. In the case of large trees, please don’t take out hardened slips from the trip until it is confirmed that it will not collapse. Once you have taken out hard slips from plasters, give it time to dry completely. Read more, how to make a ceramic bong?
2) Drilling the holes in ceramic Christmas tree
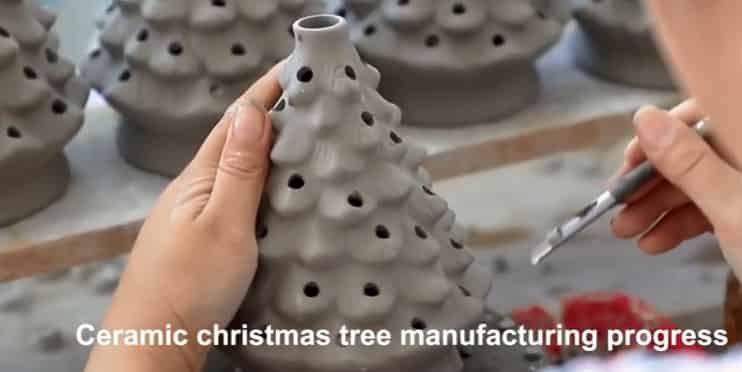
When the slit is hardened enough, use it for further processing. The next step involves the drilling of the slit. We drill many holes on the slit. It is crucial because drilling created a vibration that can break the slit. So, don’t drill at high speed.
Try using low-speed drills. Drilling holes at different locations are necessary, and the location of holes depends upon the lights and stars. Illumination of Christmas tree requires drilling holes in the slit. You can make holes where you need to install plug, lights, and stars.
A sharp object also makes fine holes. Don’t be afraid of using the drill, instead use a fine object and make proper holes in the slit. A tip here is that the slit will be wet from inside. So, putting a lot of pressure or using a high-speed drill machine will break the slit. Also, read how to make ceramic decals?
3) Drying the slit
Drying is most crucial in making a Christmas tree. You will remain in doubt for the hardness of slit till last moment. Don’t use this slit before it gets hard. It becomes more fragile and virulent when we make holes in it. Let it dry till no doubt is left. This Christmas tree remains in use for years, so you should be assured of its hardness.
Christmas tree durability is directly depending upon hardness. You should give at least 3 to 4 days to dry completely. Some time the slit looks like it is dry, but it could still be fragile. So, beware of the drying process. Check here, how to make ceramic beads?
4) Cleaning process of ceramic Christmas tree
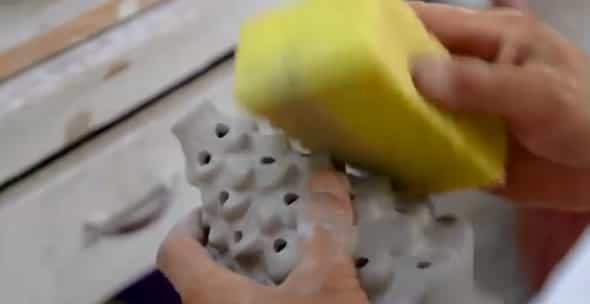
Cleaning the tree trunk is necessary after we have dried our Christmas tree. The dry slit passes through the cleaning process. It gets clean from all the sides and all the holes. During the process of drilling holes, some debris is leftover in the hole.
Cleaning removes such debris and extra hardened clay from the surface and holes. Generally, the “mold seams” find it useful in cleaning the slit. Clean not only the debris or extra clay but also the marks that are leftover on the slit.
We have confirmation that the tree framework is now completely dry, and we can clean it with water and a sponge. Using both things will clear any extra thing over the surface. You should not take out any intricate details about the tree itself. Popular content, how to make a plaster mold for ceramics?
5) Firing to bisque
The tree trunk is now ready for firing after it has been cleaned neatly. The firing process will give it a properly smooth and hard shape. It will also make it glossy. We utilize a kiln or oven for firing purposes.
Keeping the temperature at 2000 degrees, we put of tree trunk in the kiln for about 4-5 hours. Do remember many precautions while giving heat to it. Just don’t apply all the heat at once. Try giving 2000 degrees in three stages. Shut off the furnace after it and cool the Christmas tree. Also, don’t ever take out the hot tree from the kiln or oven.
Let it cool inside the kiln. The period of cooling varies, as it depends upon the size of the tree. The minimum time for cooling is at least 8-10 hours. Give 8-10 hours before opening the kiln and give 30 to 60 minutes after you have taken the lid off. These fired pieces have special names. We call them “ceramic bisque.” Related article, how to make ceramic tiles non-slippery?
6) Glazing the Christmas tree
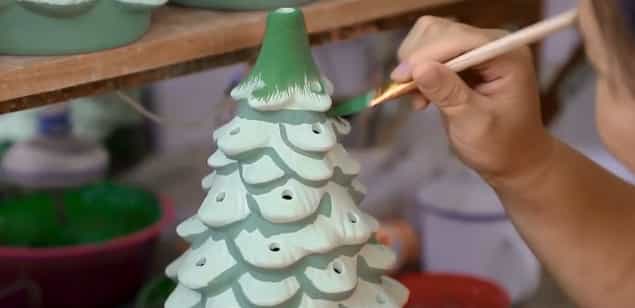
The firing gives the tree a final cover that needs glazing. This tree trunk glazes with three to four coverings of Paint. It all depends upon the color and style of preference. Apply the second coat after the first coat is dry. Our content, repair hairline cracks in ceramic floor tile?
7) Touching up
Touching up the tree means a final check-up for errors and problems in a tree. It is necessary to do because humans make mistakes and need to have a review about things. If any errors are left over, it will affect your business. You may like how to repair ceramic tiles?
8) Firing again
The newly painted tree or glazed tree requires firing again. We carefully place the tree into a kiln or oven and fire it again. This time, the temperature is almost 1800 degrees. Again, allow it to cool for the same duration as before, about 8-10 hours. May you like how to lay ceramic tiles over the concrete floor?
9) Put lights on ceramic Christmas tree
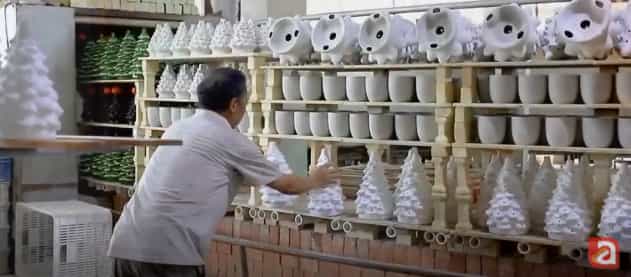
Lights present a hilarious view of the Christmas tree. They are installed at the end of the process. The selection of lights is dependant on your taste. For hilarious moments, one can install multi-color lights. Simple white lights also find the best use. Test your lights after installing. It is how your product is manufactured in the industry.
Best Way to Make a Ceramic Christmas Tree
Making a ceramic Christmas tree can be a fun and festive DIY project that adds a touch of nostalgia to your holiday decor. Here’s a step-by-step guide on how to create your own ceramic Christmas tree:
Materials You’ll Need:
- Clay or Ceramic Slip: Choose a clay suitable for ceramics or purchase ready-made ceramic slip.
- Ceramic Christmas Tree Mold: You can find ceramic Christmas tree molds at craft stores or online.
- Pottery Tools: You’ll need tools for cutting, shaping, and smoothing the clay, such as clay cutters, a rolling pin, and a sponge.
- Glazes: Select ceramic glazes in various colors for decorating your tree.
- Kiln: Access to a kiln is necessary for firing your ceramic tree.
Step-by-Step Guide:
1. Prepare Your Workspace:
Set up a clean and well-ventilated workspace with a sturdy table. Cover the table with a canvas or plastic to prevent clay residue from sticking.
2. Prepare the Clay:
Knead the clay or ceramic slip to remove air bubbles and make it pliable. Roll it out into a slab of uniform thickness using a rolling pin.
3. Create the Tree Base:
Cut out a base for your ceramic Christmas tree from the rolled-out clay. The base should be circular and wide enough to provide stability.
4. Form the Tree:
Using a Christmas tree mold, press the clay into the mold to create the tree’s shape. Ensure the clay fills all the details of the mold.
5. Add Decorative Features:
Using additional clay, create small decorations like ornaments, stars, or snowflakes. Attach them to the tree while the clay is still moist, using slip as adhesive.
6. Allow Drying Time:
Let your ceramic Christmas tree air dry slowly. This can take several days or longer, depending on the thickness of the clay and humidity levels.
7. Bisque Firing:
Place your dried tree and decorations in a kiln for bisque firing. This initial firing removes moisture and hardens the clay. Follow the kiln’s recommended temperature and firing schedule.
8. Glaze Your Tree:
After the bisque firing, apply ceramic glazes to your Christmas tree and decorations. Use various colors to create a festive look. Allow the glazes to dry before proceeding.
9. Glaze Firing:
Fire your glazed tree in the kiln according to the recommended temperature for the glazes you used. This final firing will give your ceramic Christmas tree its colorful finish.
10. Final Touches:
Once your tree has cooled down, inspect it for any sharp edges or imperfections. Smooth them out with sandpaper if necessary. Clean the tree thoroughly to remove any glaze residue.
11. Display Your Ceramic Christmas Tree:
Place your beautifully crafted ceramic Christmas tree on a tabletop, mantel, or any spot where it can add a festive touch to your holiday decor.
Creating a ceramic Christmas tree can be a delightful and creative holiday project, and the final result is a charming piece of decor that can become a treasured part of your seasonal celebrations.
FAQs
Certainly! Here are some frequently asked questions (FAQs) on how to make a ceramic Christmas tree:
What is a ceramic Christmas tree?
A ceramic Christmas tree is a decorative holiday item often made from ceramic or porcelain. It typically consists of a tree-shaped base adorned with small, colorful, and removable bulbs or lights. These trees are a popular nostalgic holiday decoration.
Can I make a ceramic Christmas tree at home?
Yes, you can make a ceramic Christmas tree at home if you have experience with ceramics or pottery. It involves creating or purchasing a ceramic base, glazing and firing it, adding small bulb inserts or painting ornaments, and assembling the tree.
What materials do I need to make a ceramic Christmas tree?
To make a ceramic Christmas tree, you’ll need clay or a ceramic base, glazes, a kiln or access to firing services, small bulb inserts or ornaments, a paintbrush, and any additional decorative elements you’d like to add.
Can I make a ceramic Christmas tree without a kiln?
Making a ceramic Christmas tree typically requires firing the ceramic base in a kiln, as this process hardens and sets the clay. If you don’t have access to a kiln, consider using air-dry clay or other materials for a non-ceramic alternative.
How do I add lights to my ceramic Christmas tree?
To add lights to your ceramic Christmas tree, you can use small bulb inserts designed for ceramic trees. These often come with attached wires that can be threaded through holes in the tree’s branches. Secure the bulbs in place, and your tree will light up.
Are there specific patterns or designs for ceramic Christmas trees?
There are various patterns and designs available for ceramic Christmas trees, ranging from traditional to contemporary. You can find templates and inspiration online or create your own unique design.
Can I personalize my ceramic Christmas tree?
Yes, you can personalize your ceramic Christmas tree by adding your choice of glaze colors, ornaments, and decorations. This allows you to create a one-of-a-kind tree that suits your holiday style.
How long does it take to make a ceramic Christmas tree?
The time it takes to make a ceramic Christmas tree can vary based on your experience level, the complexity of the design, and the firing process. It may take several hours or even days to complete, including drying and firing times.
Can I make a ceramic Christmas tree as a gift or for sale?
Yes, you can make ceramic Christmas trees as gifts or for sale if you have the necessary skills and materials. They can make thoughtful and unique holiday presents or craft items to sell during the festive season.
Where can I find ceramic Christmas tree kits or supplies?
You can find ceramic Christmas tree kits, supplies, and accessories at craft stores, pottery supply shops, or online retailers. Kits often include the ceramic base, lights, and sometimes glazes.
Creating a ceramic Christmas tree can be a rewarding and creative holiday project, allowing you to craft a beautiful and festive decoration to cherish or share with loved ones.
Conclusion
In conclusion, crafting a ceramic Christmas tree is a delightful and artistic endeavor that adds a personal touch to your holiday decorations. This festive project offers a chance to create a unique and cherished piece of art that can become a cherished family heirloom or a thoughtful gift for friends and loved ones.
While making a ceramic Christmas tree may require some pottery or ceramic crafting skills and access to the necessary materials, the end result is a beautiful and customizable decoration that captures the spirit of the holiday season. Whether you choose a traditional or contemporary design, the process allows for creativity and personalization.
Remember to enjoy the journey of crafting your ceramic Christmas tree, from shaping the base to glazing, firing, and decorating. It’s an opportunity to express your holiday spirit and create lasting memories. Whether displayed on your mantle, dining table, or given as a special gift, your handmade ceramic Christmas tree will surely bring joy and warmth to the festive season for years to come.
Can you drill more holes in an already completed tree to add more light holes. If so what kind of drill bit ? Thank you